One onboarding. Every Claude surface.
/login). Pay the friction once, get the tools everywhere.You need a reasoning.services account
A paid account is required. No free tier — the connector authenticates via OAuth and checks your subscription on every call.
Sign up for reasoning.servicesSetup guide
Complete these steps once per tool — one pass through Steps 2–8 for each tool you want.
Step 1 — Open the Connectors page
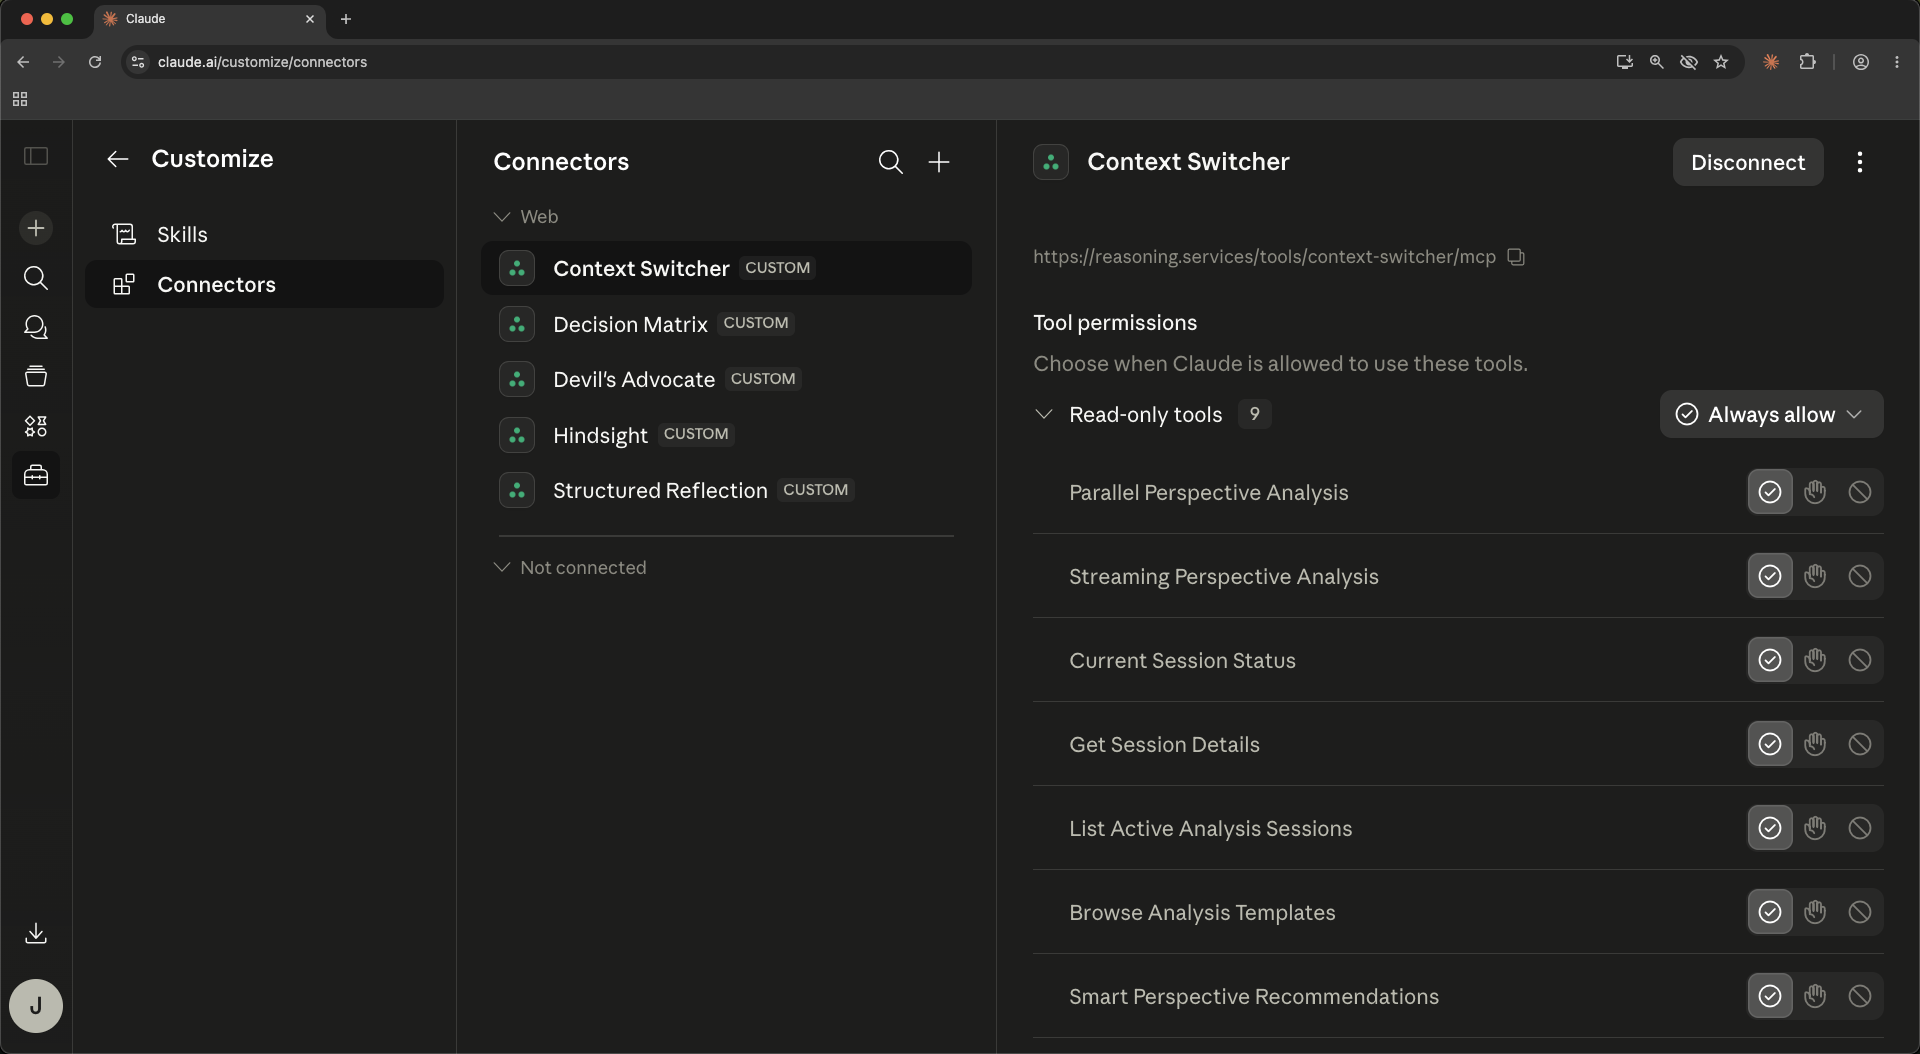
Go to claude.ai/customize/connectors. You'll see your existing connectors grouped under “Web” and “Not connected.” If this is your first connector, both groups may be empty — that's fine.
Step 2 — Click the + (top right of the Connectors column)
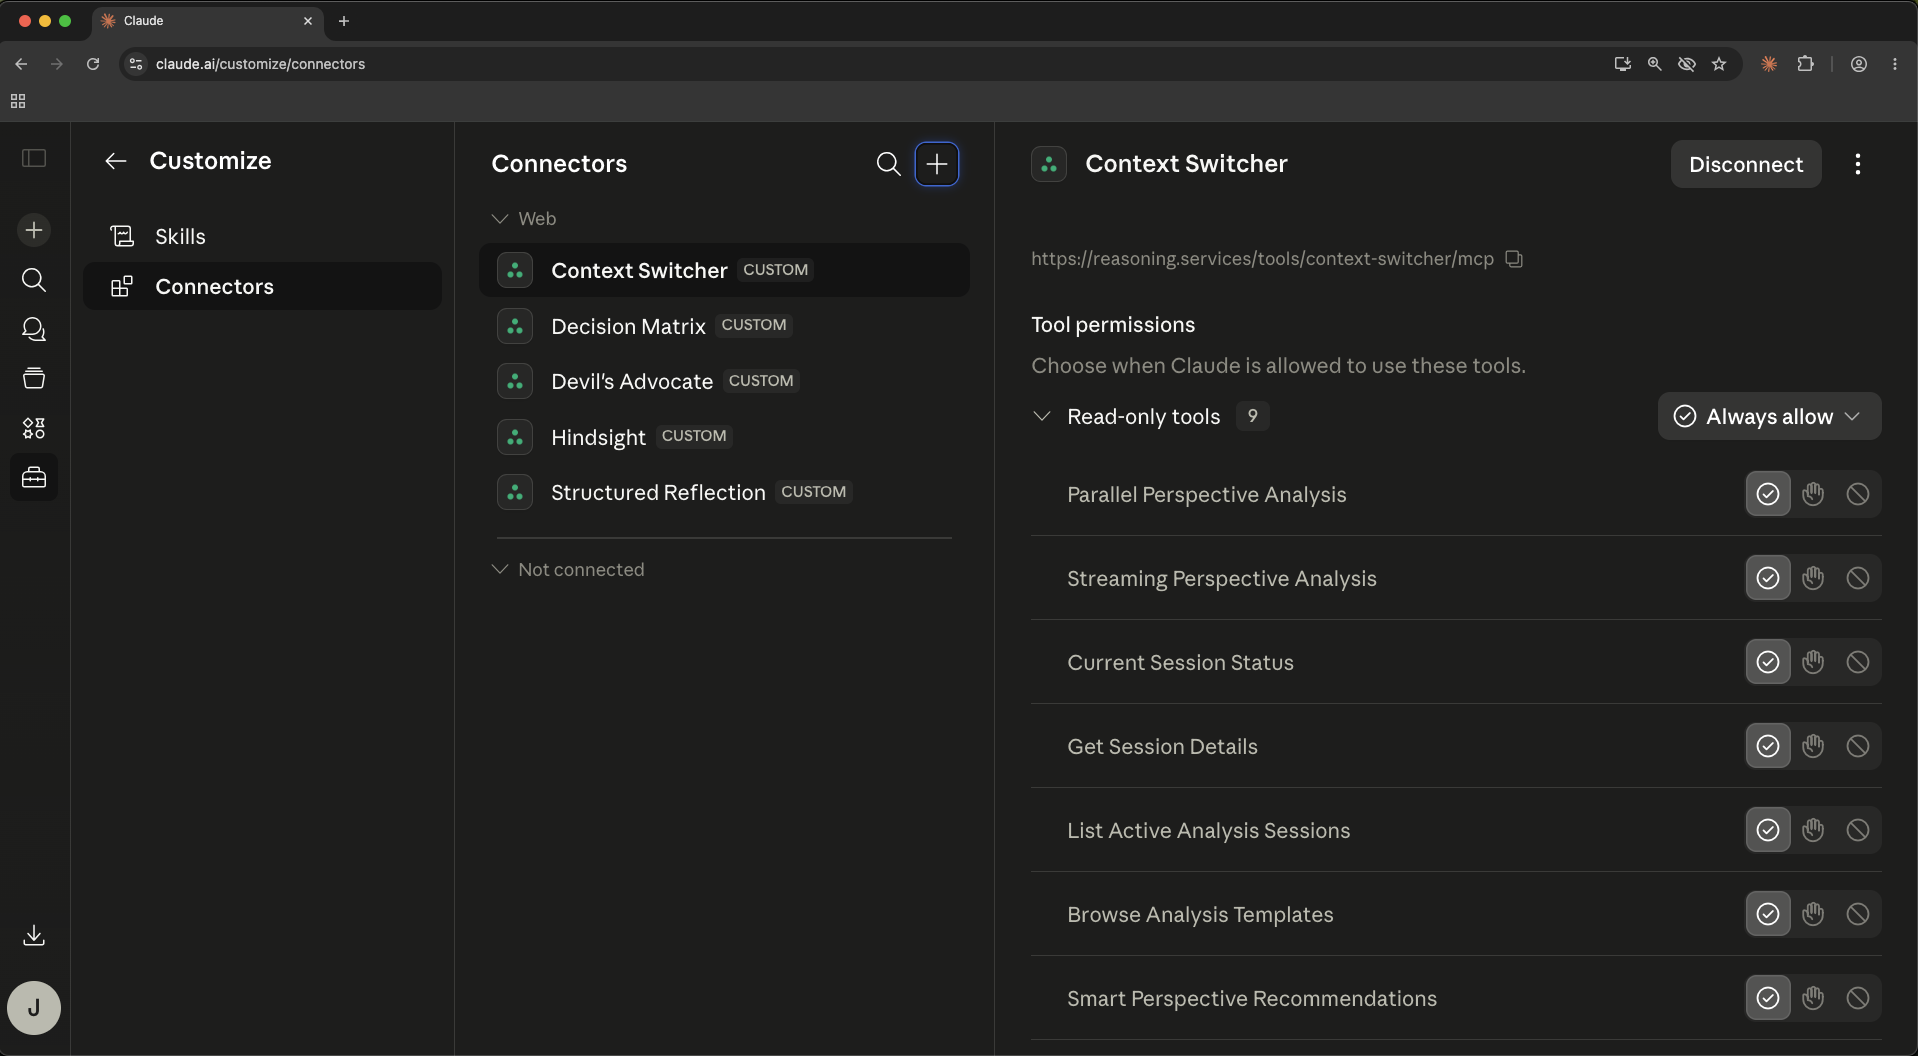
You're looking for the small plus icon next to the search icon, not the one in the left sidebar. The latter creates a new chat.
Step 3 — Choose “Add custom connector”
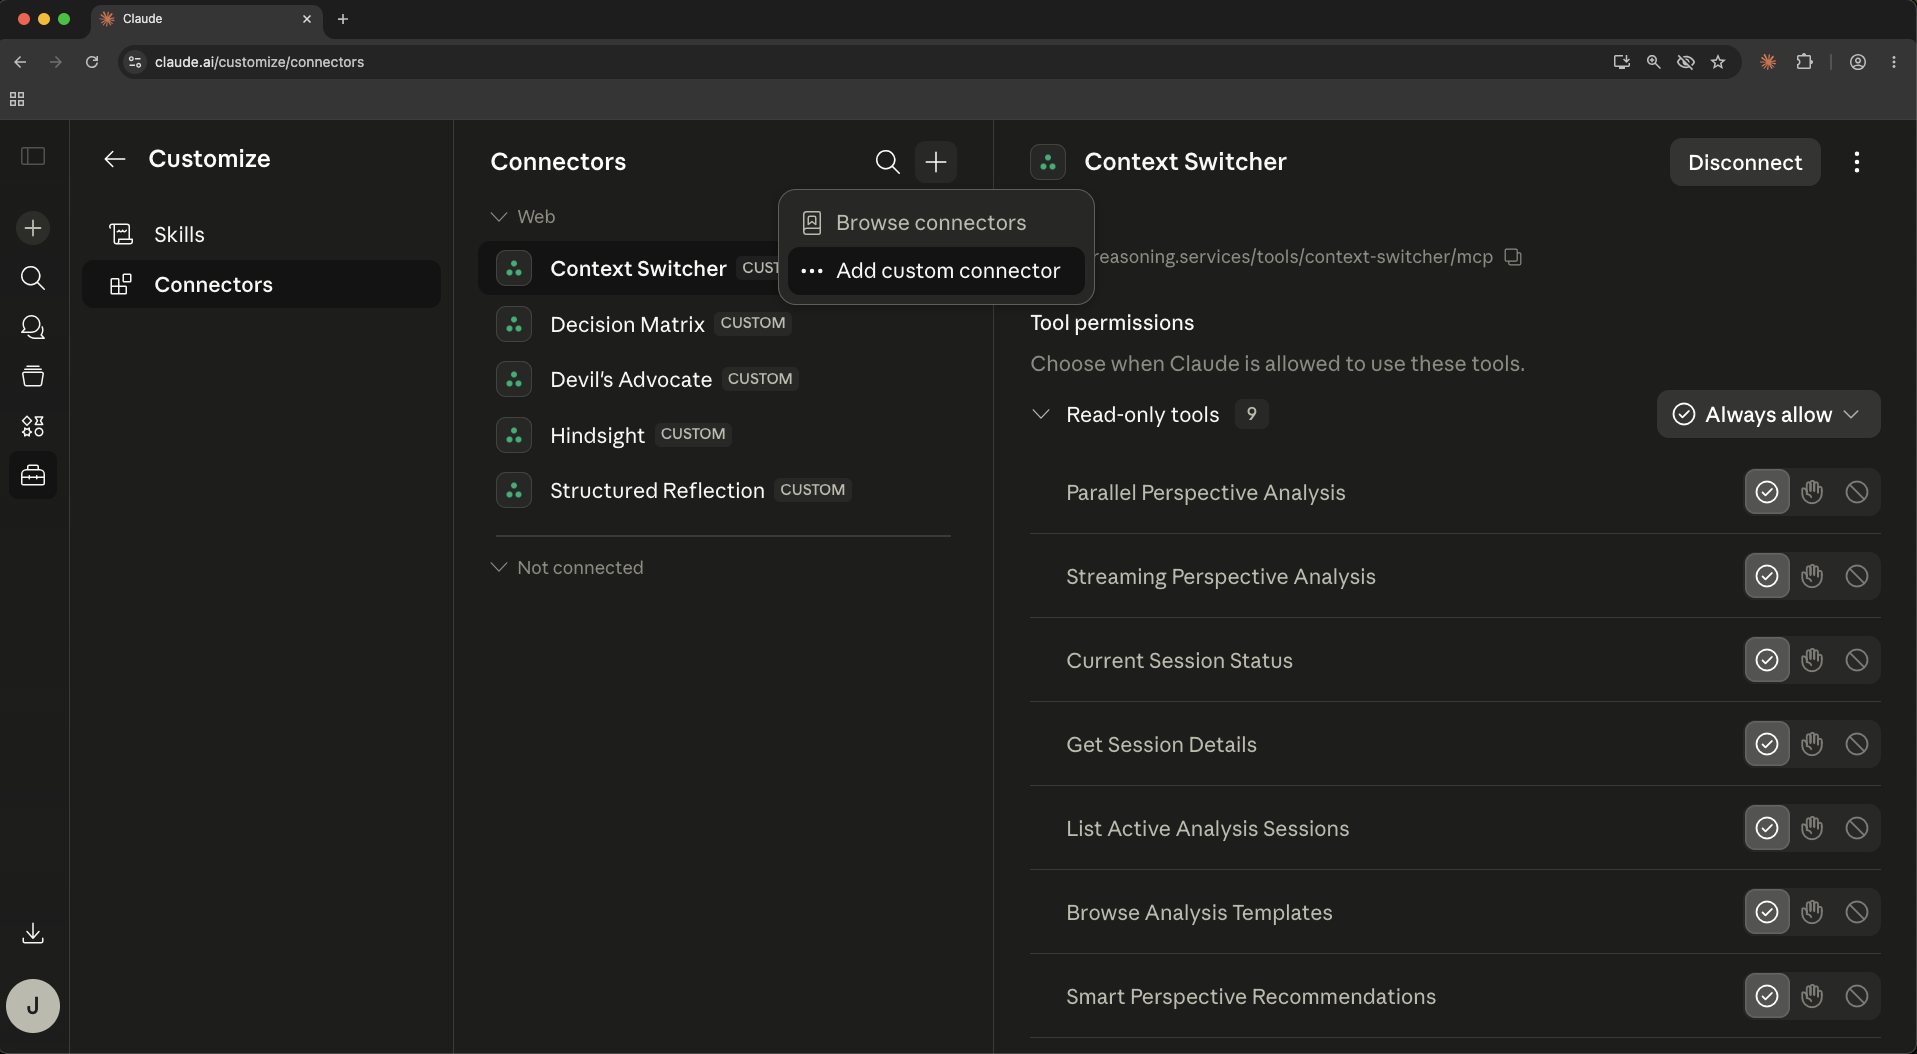
Two options appear: Browse connectors (Anthropic's verified directory) and Add custom connector. reasoning.services lives in the custom path — pick the second.
Step 4 — The modal opens
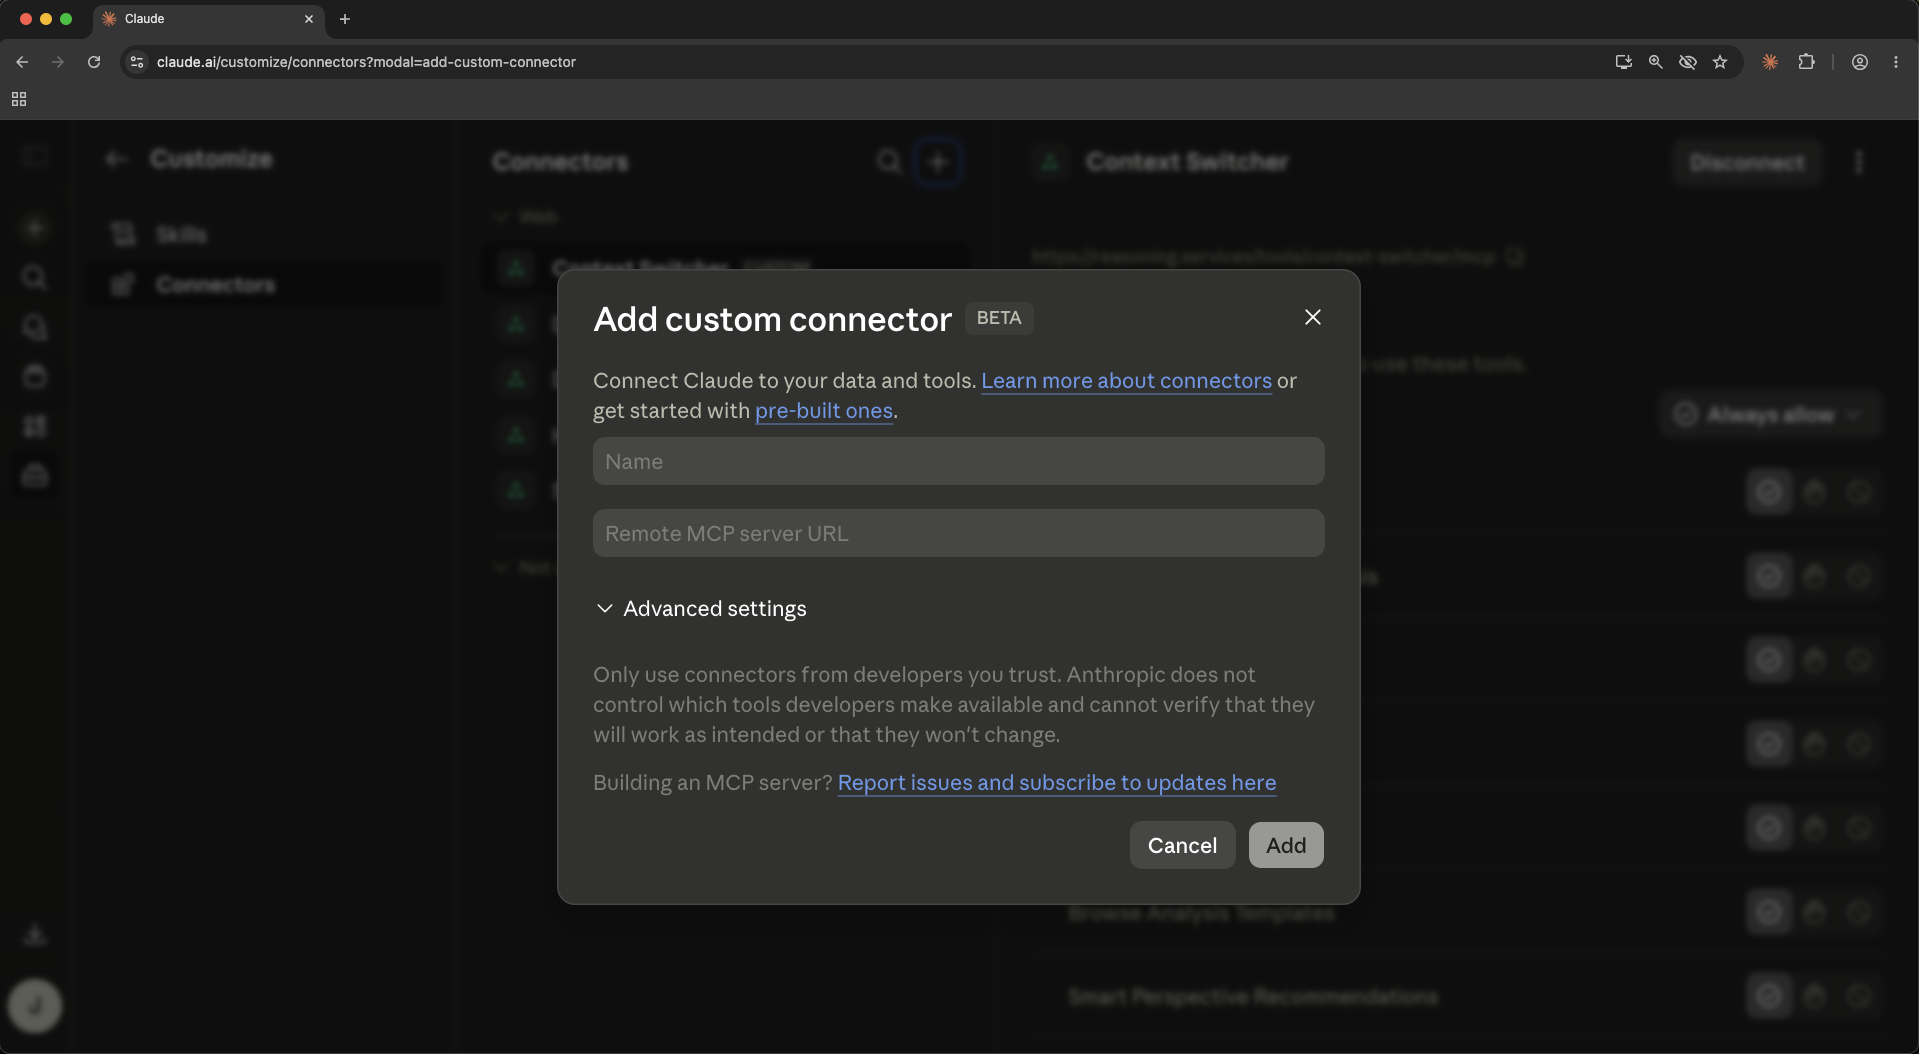
A dialog titled “Add custom connector (Beta)” appears with two empty fields. The Beta tag is Claude.ai's, not ours — the underlying spec (MCP Streamable HTTP) is stable.
Step 5 — Paste a service name and URL
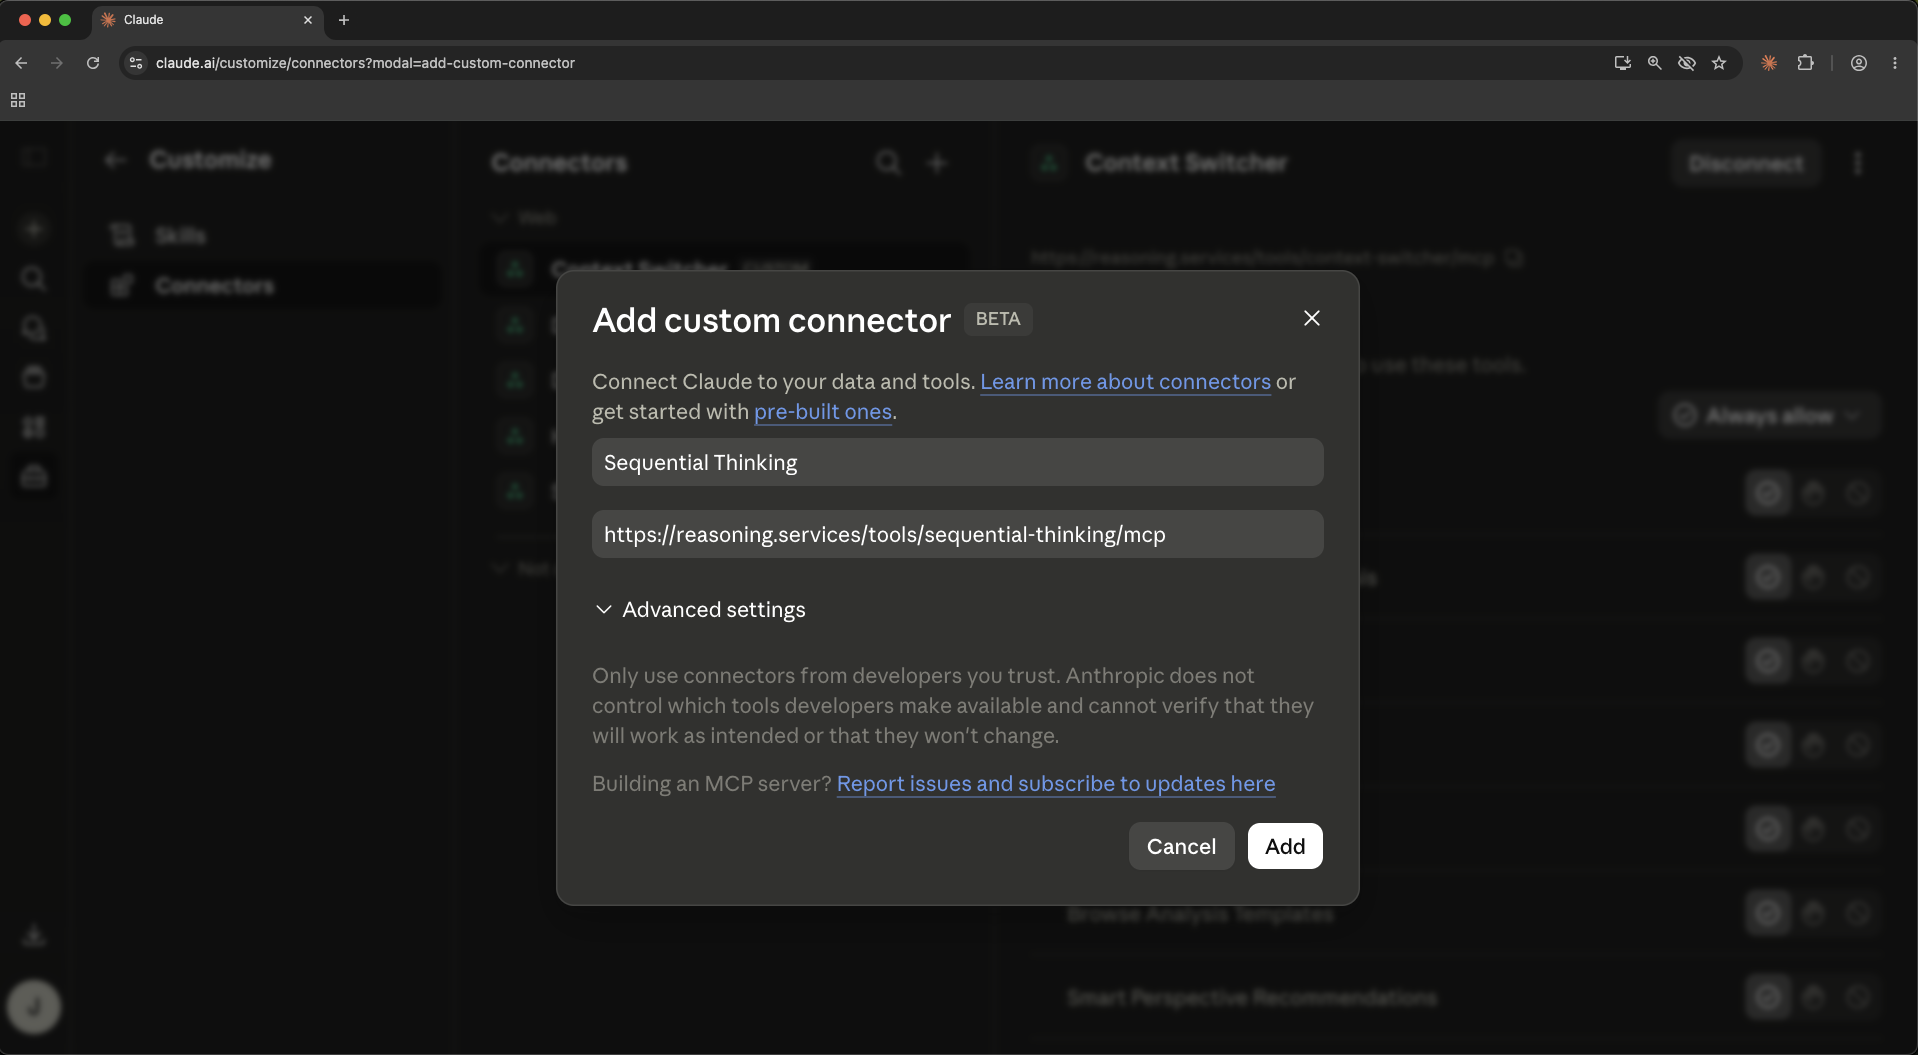
You're going to repeat this once per tool. Each row below contains the exact Name and Remote MCP server URL to paste.
| Name | Remote MCP server URL | Copy |
|---|---|---|
| Structured Reflection | https://reasoning.services/tools/structured-reflection/mcp | |
| Sequential Thinking | https://reasoning.services/tools/sequential-thinking/mcp | |
| Context Switcher | https://reasoning.services/tools/context-switcher/mcp | |
| Decision Matrix | https://reasoning.services/tools/decision-matrix/mcp | |
| Devil's Advocate | https://reasoning.services/tools/devils-advocate/mcp | |
| Graph of Thought | https://reasoning.services/tools/graph-of-thought/mcp | |
| Formal Logic | https://reasoning.services/tools/formal-logic/mcp | |
| Hindsight | https://reasoning.services/tools/hindsight/mcp |
Step 6 — Click Add
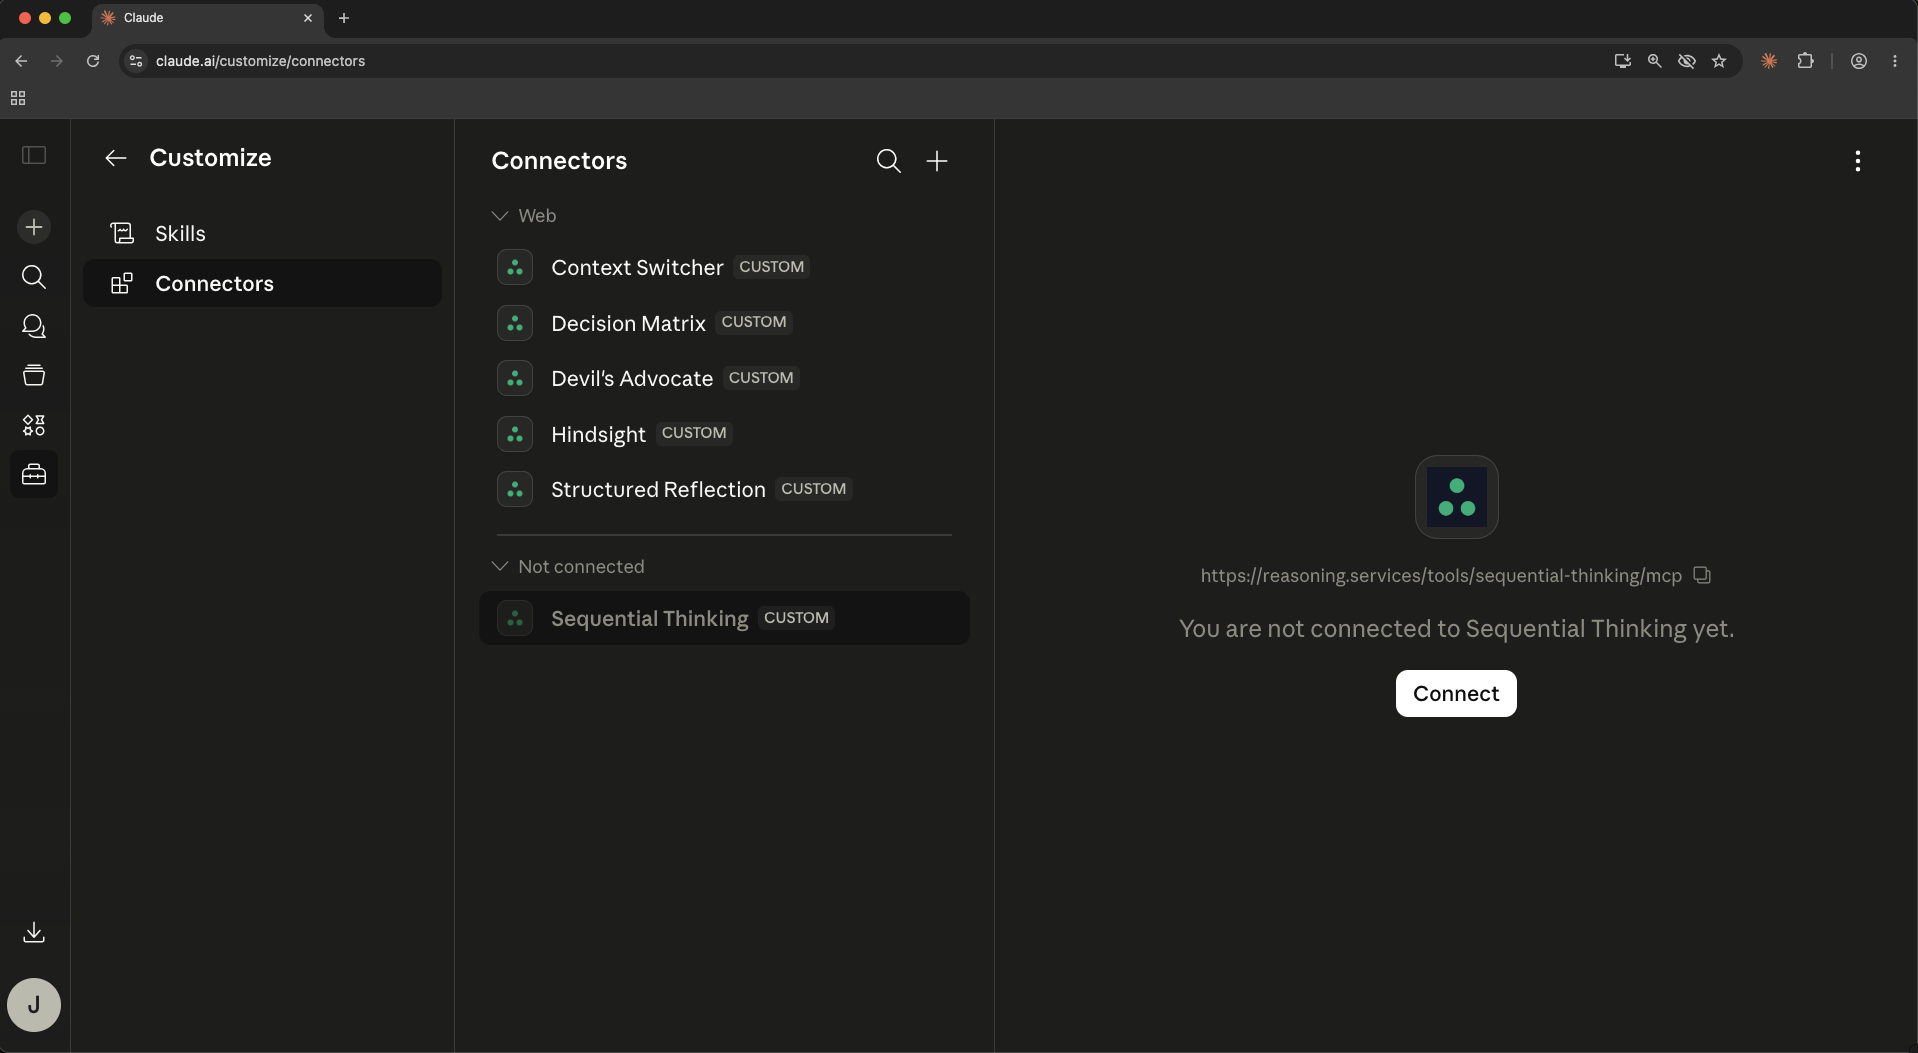
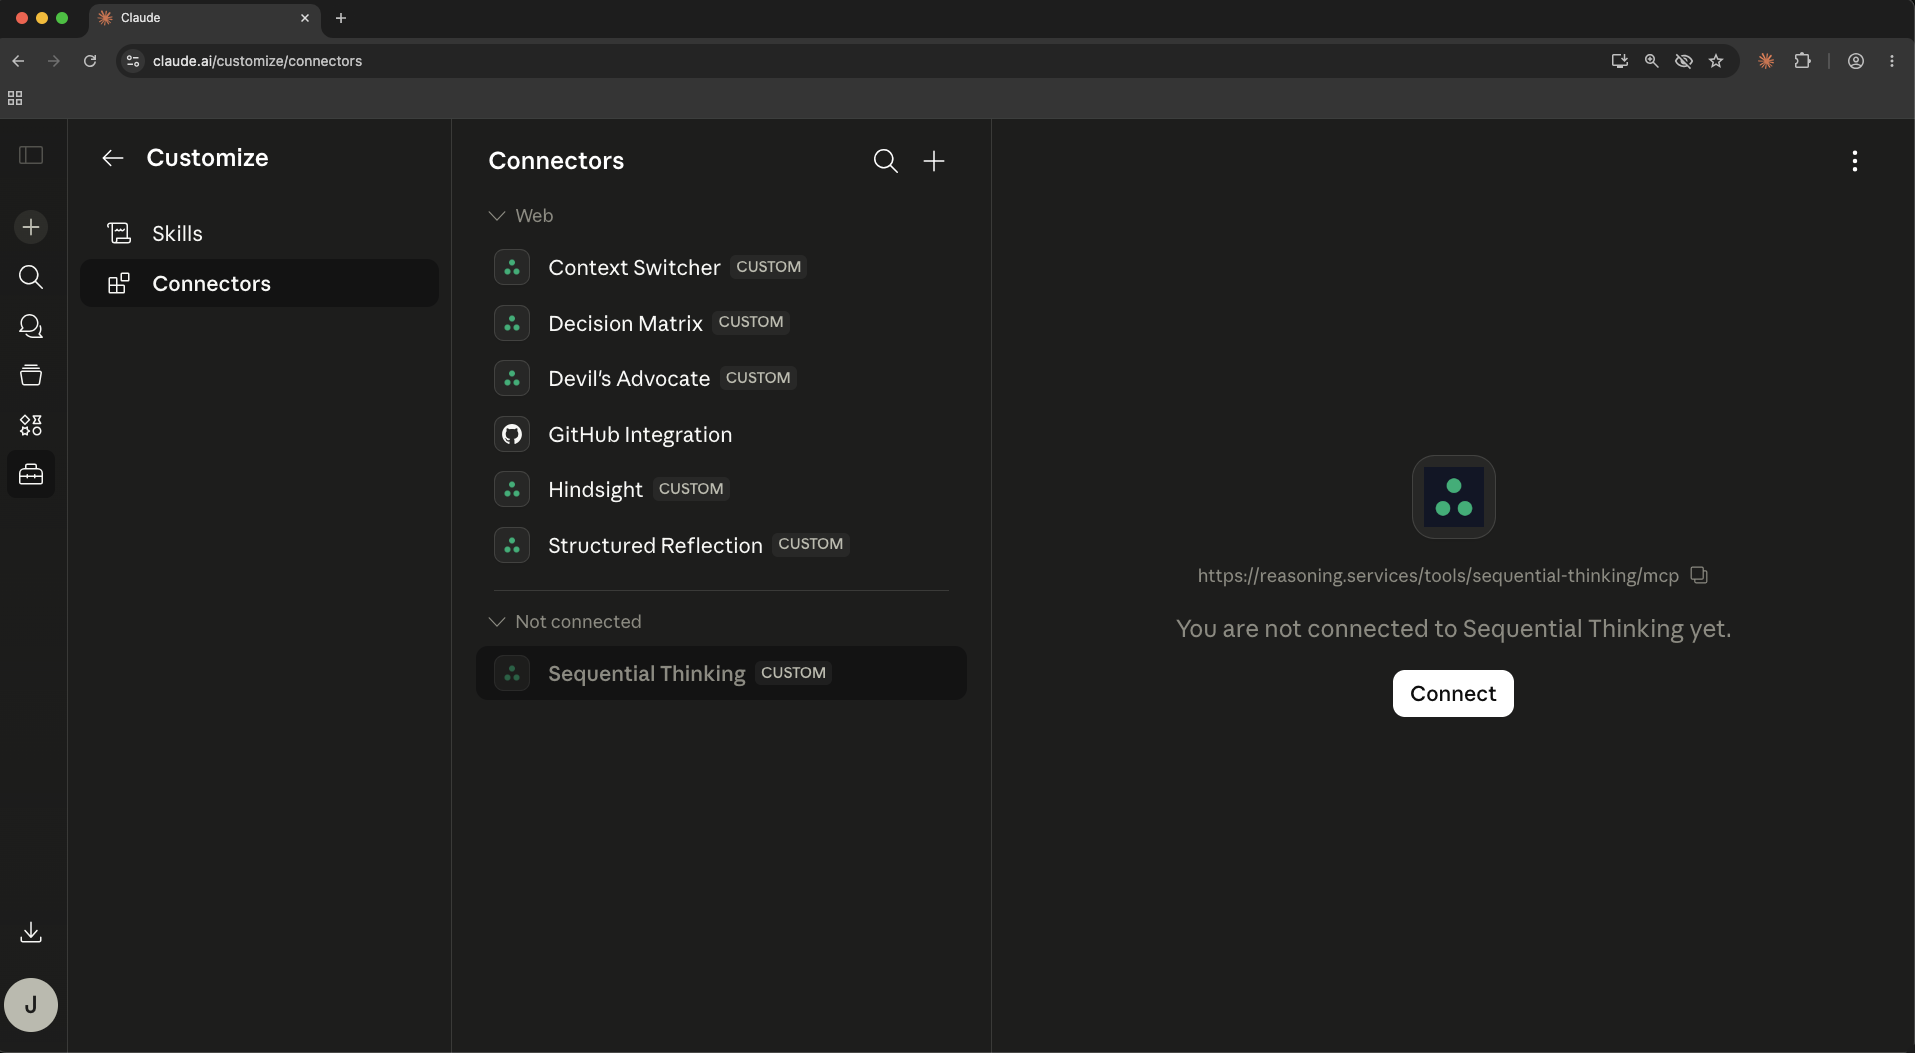
The modal closes. The new connector appears under “Not connected.” Right panel shows a Connect button. You're not done yet — the connector exists but Claude has no token to call it.
Step 7 — Click Connect → sign in to reasoning.services
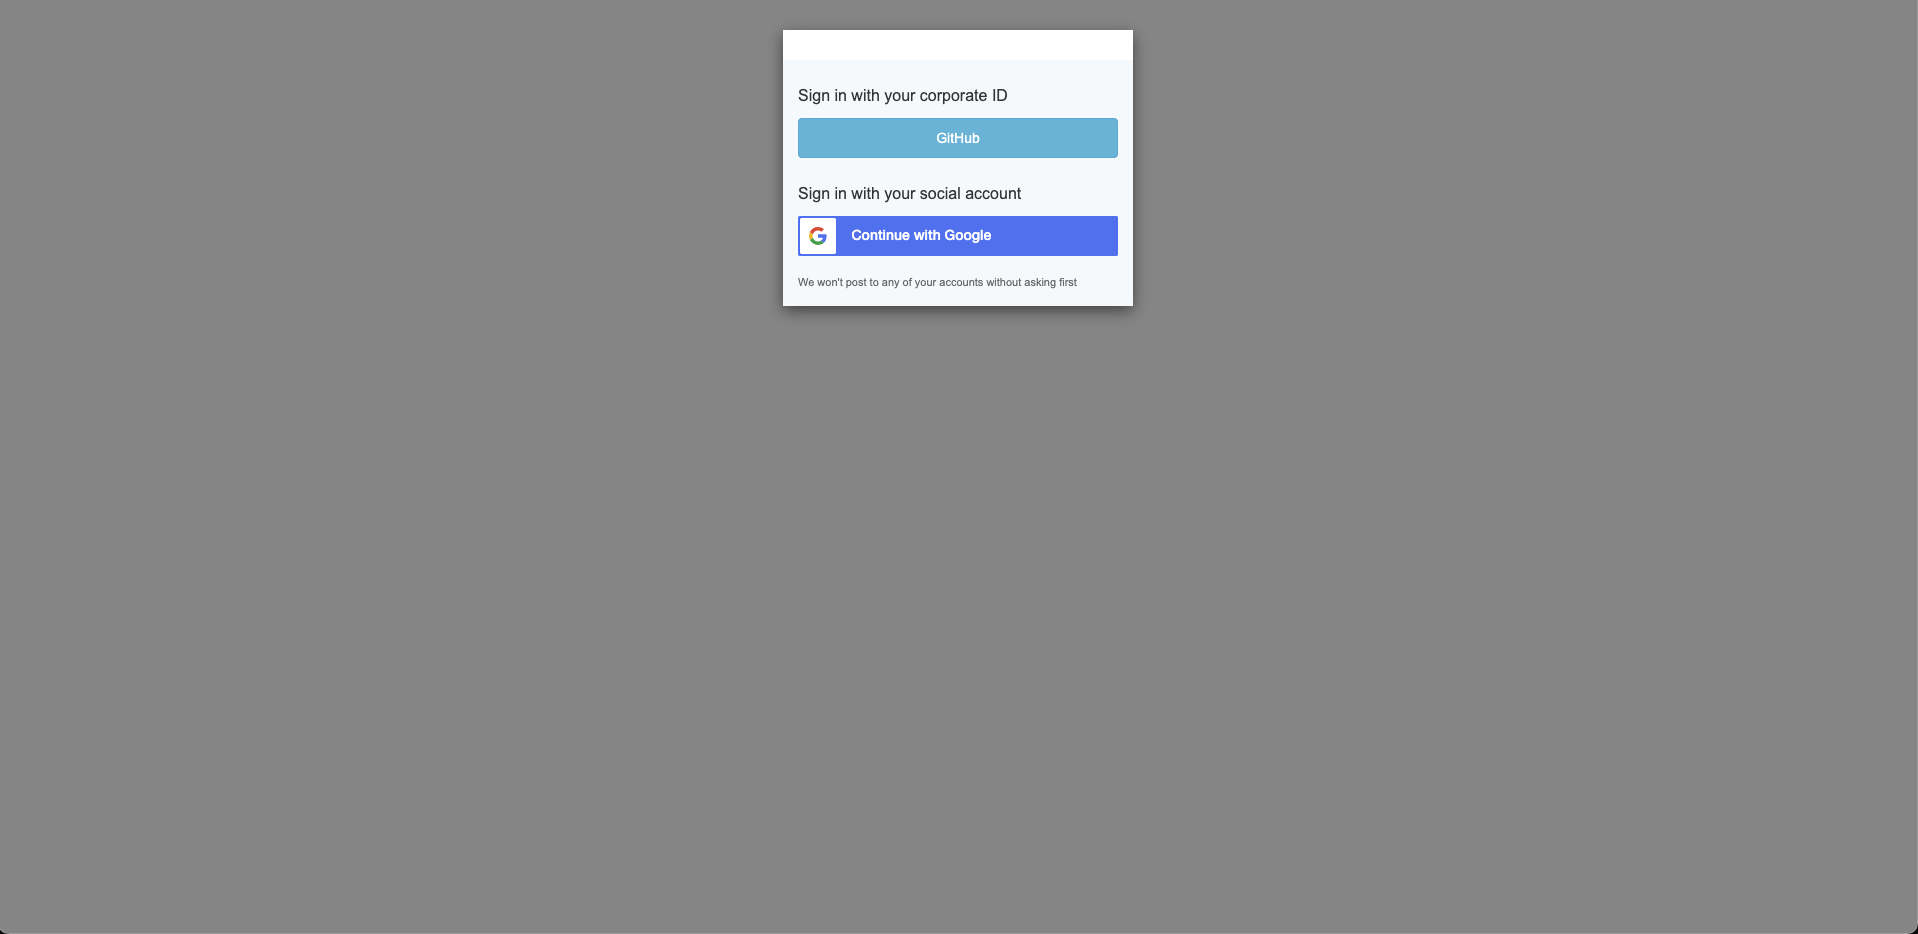
A popup window opens to reasoning.services, not to Anthropic. You'll see two options:
- Sign in with your corporate ID (GitHub) — for developer accounts
- Continue with Google — for everyone else
This is the same sign-in you used when you created your reasoning.services account. The popup closes itself when authentication succeeds.
Phishing check
The URL bar in the popup should read *.reasoning.services or auth.reasoning.services. If it doesn't, close the popup and start over.
Step 8 — You're connected
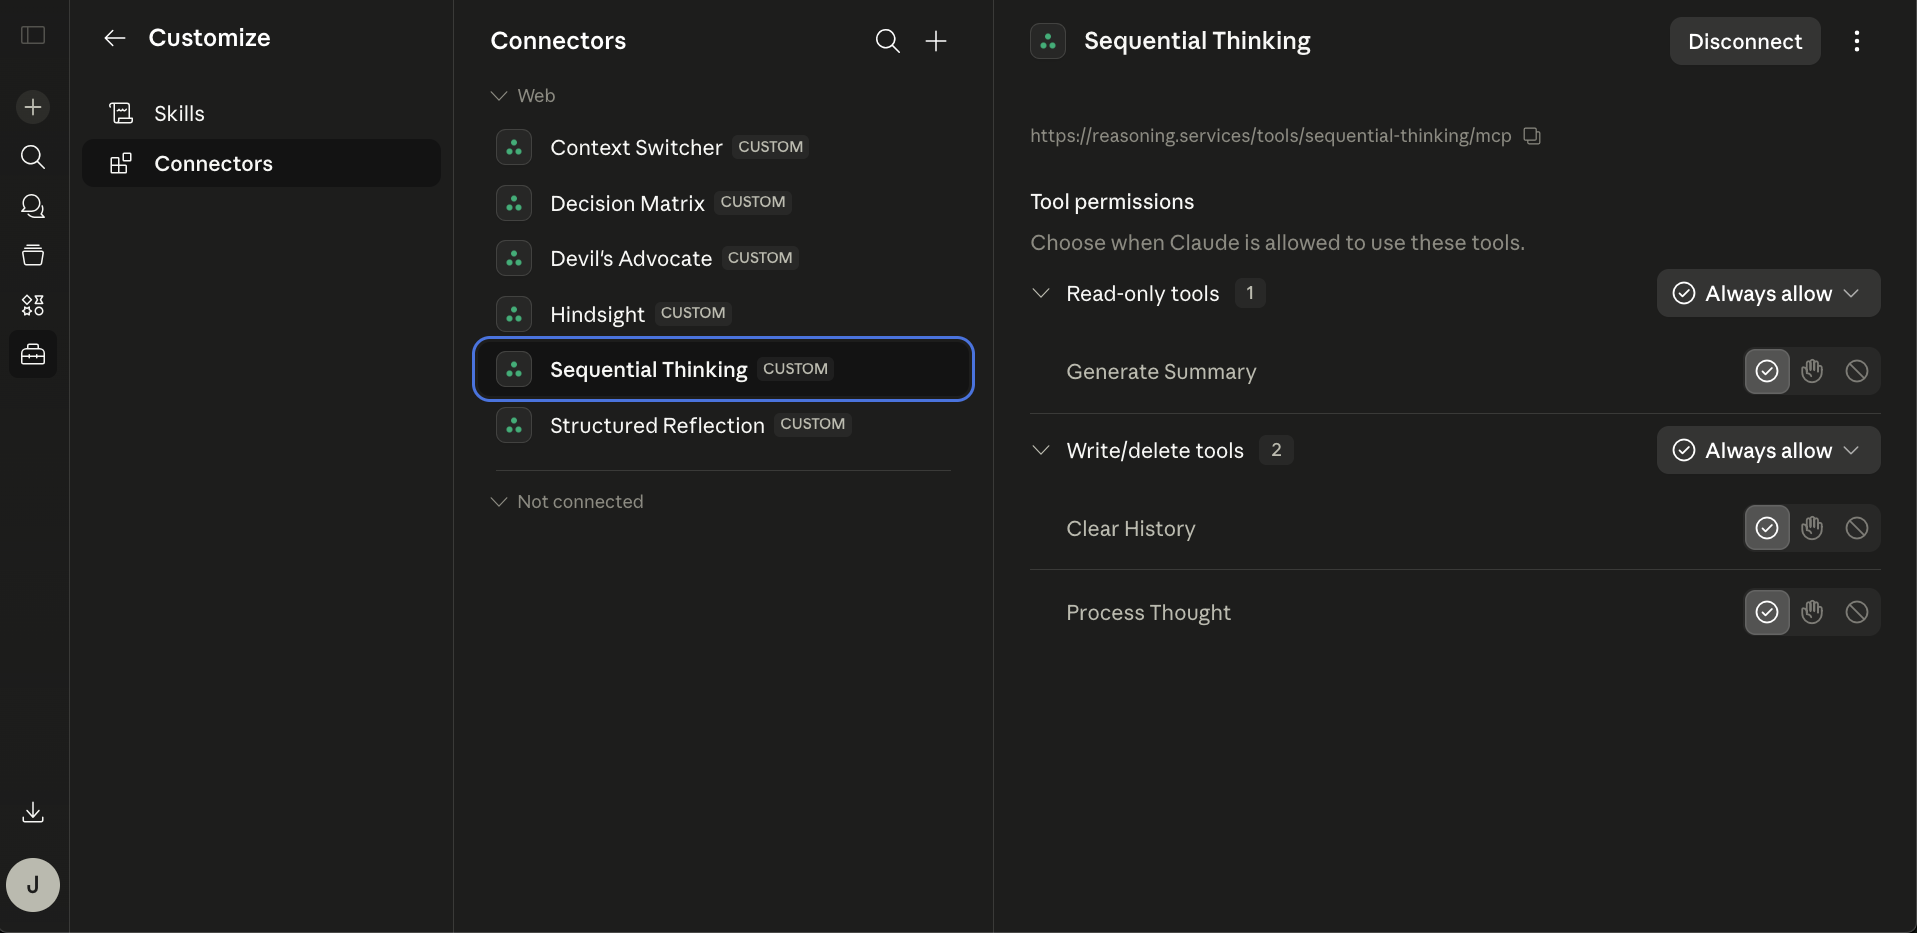
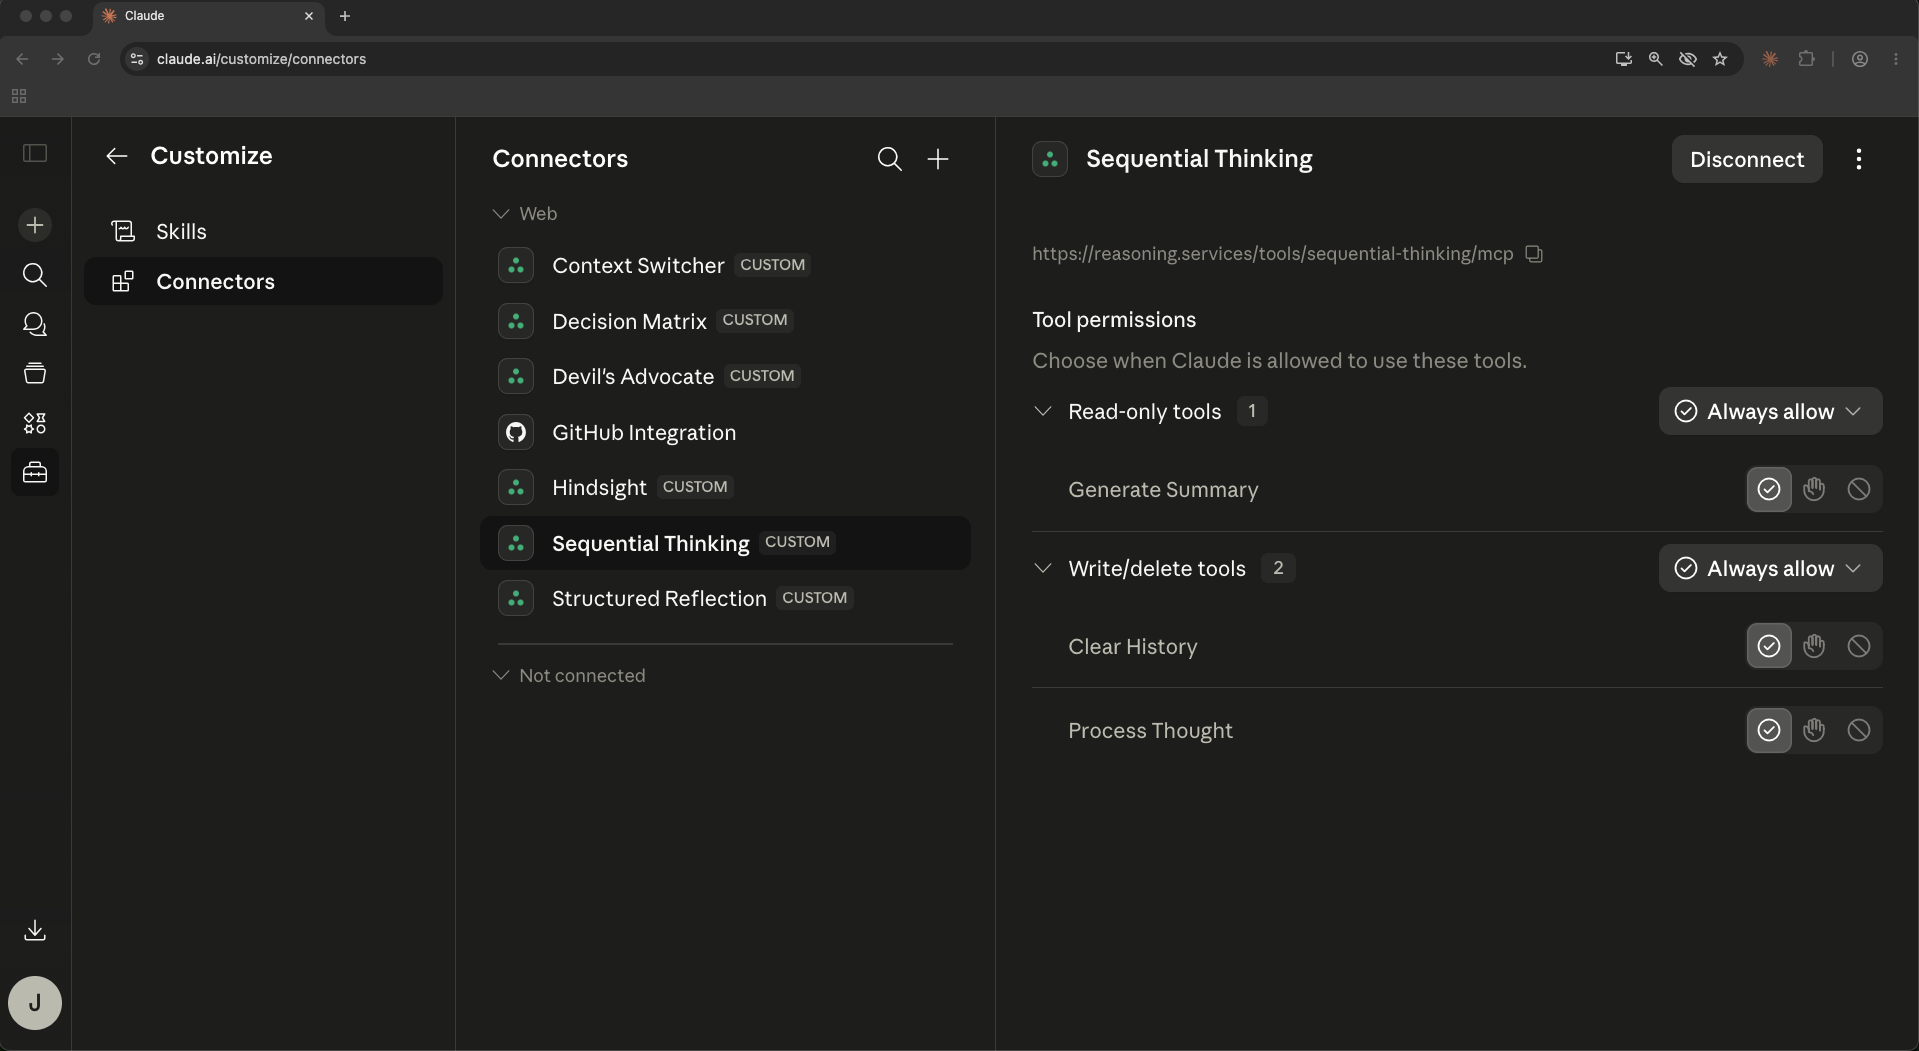
Back on the Connectors page, the new connector has moved into the Web group. The right panel shows its tools — typically split into “Read-only tools” and “Write/delete tools.” Default permission is Always allow.
Connection typically completes in under 30 seconds. If it takes longer, see Troubleshooting below.Step 9 — (Optional) Customize tool permissions

Click any Always allow dropdown to change the trust level for that tool category.
- Always allow
- Claude calls the tool without asking. No interruption to the reasoning loop.
- Needs approval
- Claude pauses and asks you before each tool invocation.
- Blocked
- Claude cannot call this tool at all. Use to disable temporarily without disconnecting.
- Custom
- Per-tool overrides within a category. Primarily useful for mixed-sensitivity connectors.
Step 9.5 — Our recommendation: leave Always allow everywhere
Always allow is correct for every reasoning.services tool. Here's why the alternatives are counterproductive:
Needs approval — Every approval prompt breaks the loop. The cognitive value of the tool comes from Claude reasoning with you in real time — interruption defeats the point.
| Use this | When |
|---|---|
| Always allow (default) | Always, for reasoning.services tools |
| Needs approval | Only if auditing — switch back after |
| Blocked | Only to disable temporarily without disconnecting |
| Custom | Effectively reserved for mixed-sensitivity connectors — not useful here |
Step 10 — Verify everywhere you use Claude
Your connectors are now available on every Claude.ai-authenticated surface: web, mobile, Cowork, Claude Desktop, and Claude Code (once you /login Claude Code to the same account).
Claude Code bridge
Confirm your Claude.ai account is active in Claude Code and verify the MCP servers appear:
# Confirm Claude.ai is your active auth method
claude /status

# Open Claude Code and list MCP servers
claude
> /mcp
Expected output: entries prefixed with claude.ai for each reasoning.services connector, status connected.
If the connectors are missing, clear competing auth credentials and log in with your Claude.ai account:
unset ANTHROPIC_API_KEY ANTHROPIC_AUTH_TOKEN
# remove any apiKeyHelper from ~/.claude/settings.json
claude /login        # pick your Claude.ai account
Now repeat for each remaining tool.
Repeat Steps 2–8 with each URL from Step 5. Once your connectors are connected:
- Claude.ai web
- Claude.ai mobile (iOS and Android)
- Claude Cowork (shared workspaces)
- Claude Desktop (synced from your account)
- Claude Code — after
claude /loginwith your Claude.ai account
§7.6 — Disconnecting or removing a connector
Two different actions live in the same Connectors panel. They look similar but have opposite consequences for your OAuth token and tool permissions.
| Action | OAuth token | Tool permissions | When to use |
|---|---|---|---|
| Disconnect | Revoked — you re-authorize on next Connect | Preserved | Temporary — switching accounts, debugging auth |
| Remove | Revoked and deleted | Destroyed | Permanent — retiring the connector entirely |
| Re-connecting after Disconnect restores your saved permission settings. | |||
| Re-adding after Remove starts from scratch — Always allow everywhere is the default. | |||
Warning
Anthropic's modal copy is identical for Disconnect and Remove. Both dialogs say “Are you sure?” with no additional context. Read the action label in the connector panel carefully before confirming.
To disconnect
1. Open the Connectors page. Your active connector is in the Web group on the left panel. Click it to select it.
2. Click the “Disconnect” button in the right panel (or via the kebab menu). A confirmation dialog opens.
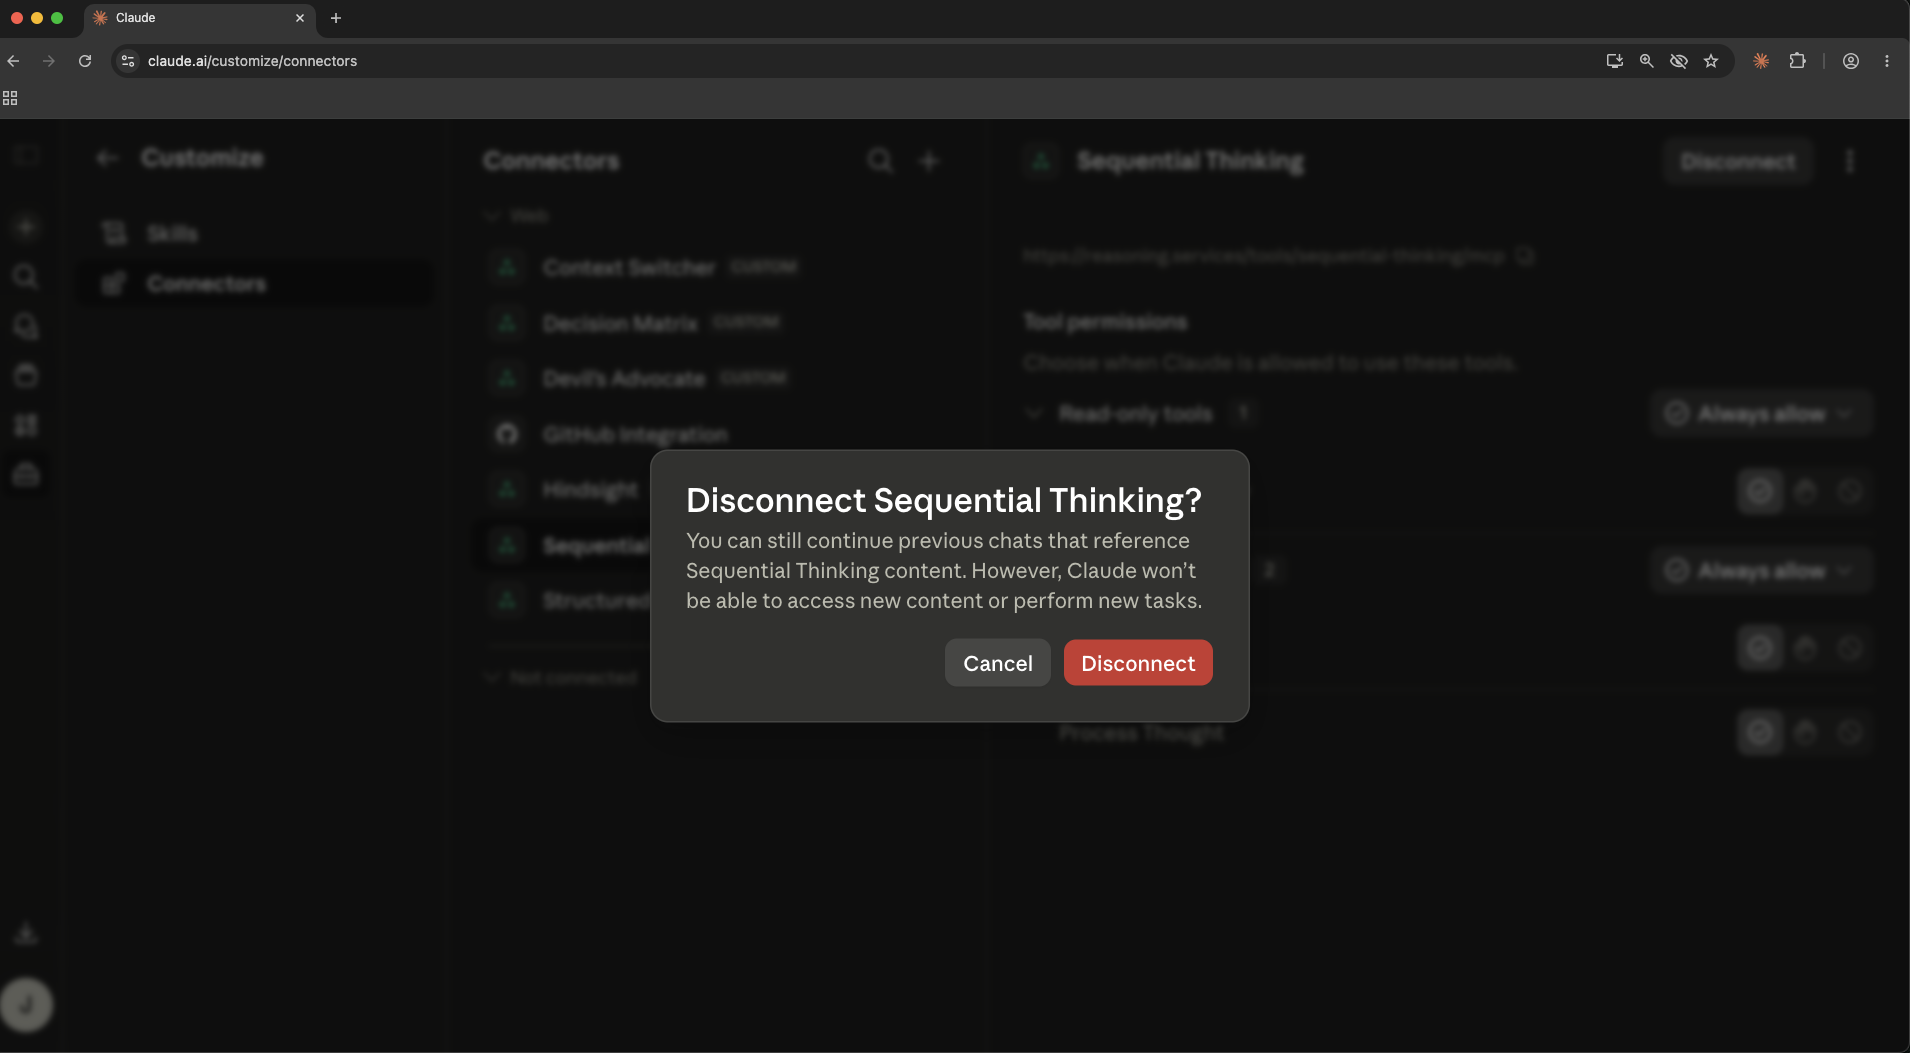
3. Confirm. The connector moves back to “Not connected.” Your permission settings are preserved for when you reconnect.
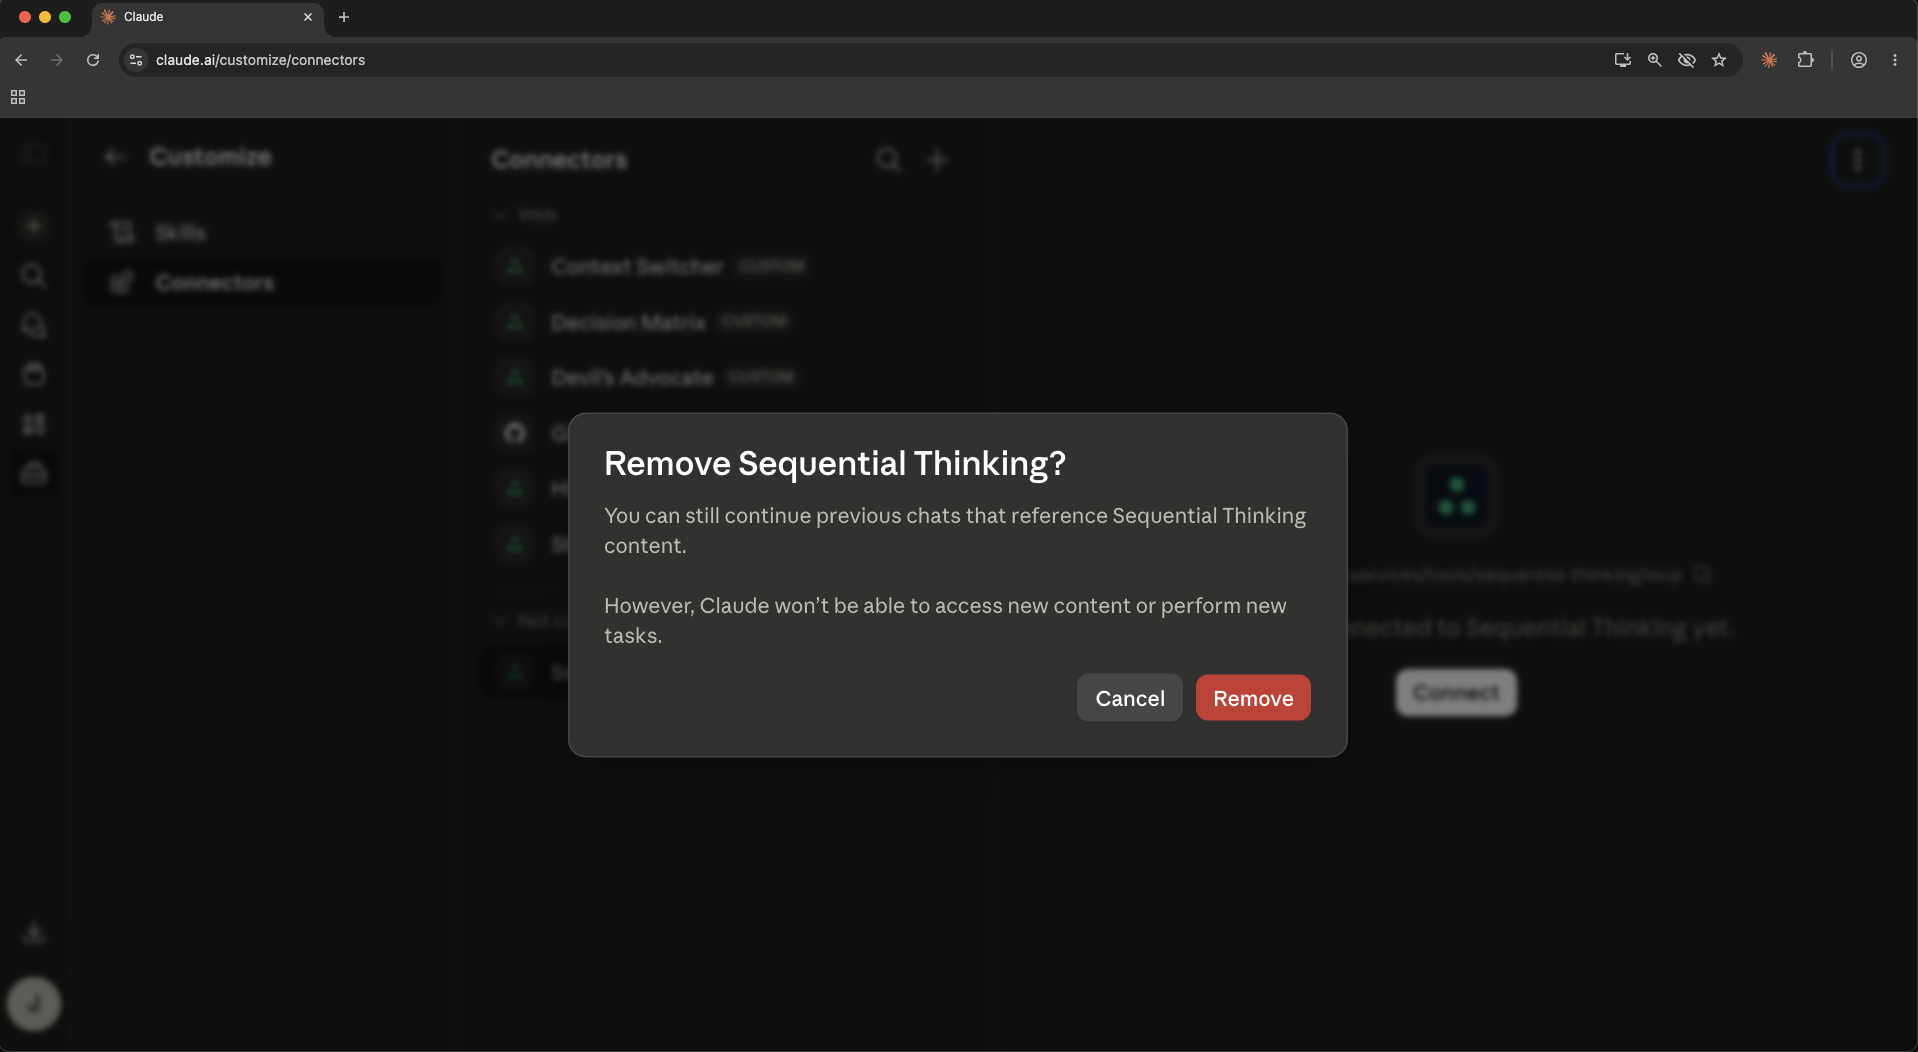
To remove
1. Open the kebab menu (three dots) next to the connector name in the left panel. Select “Remove.”
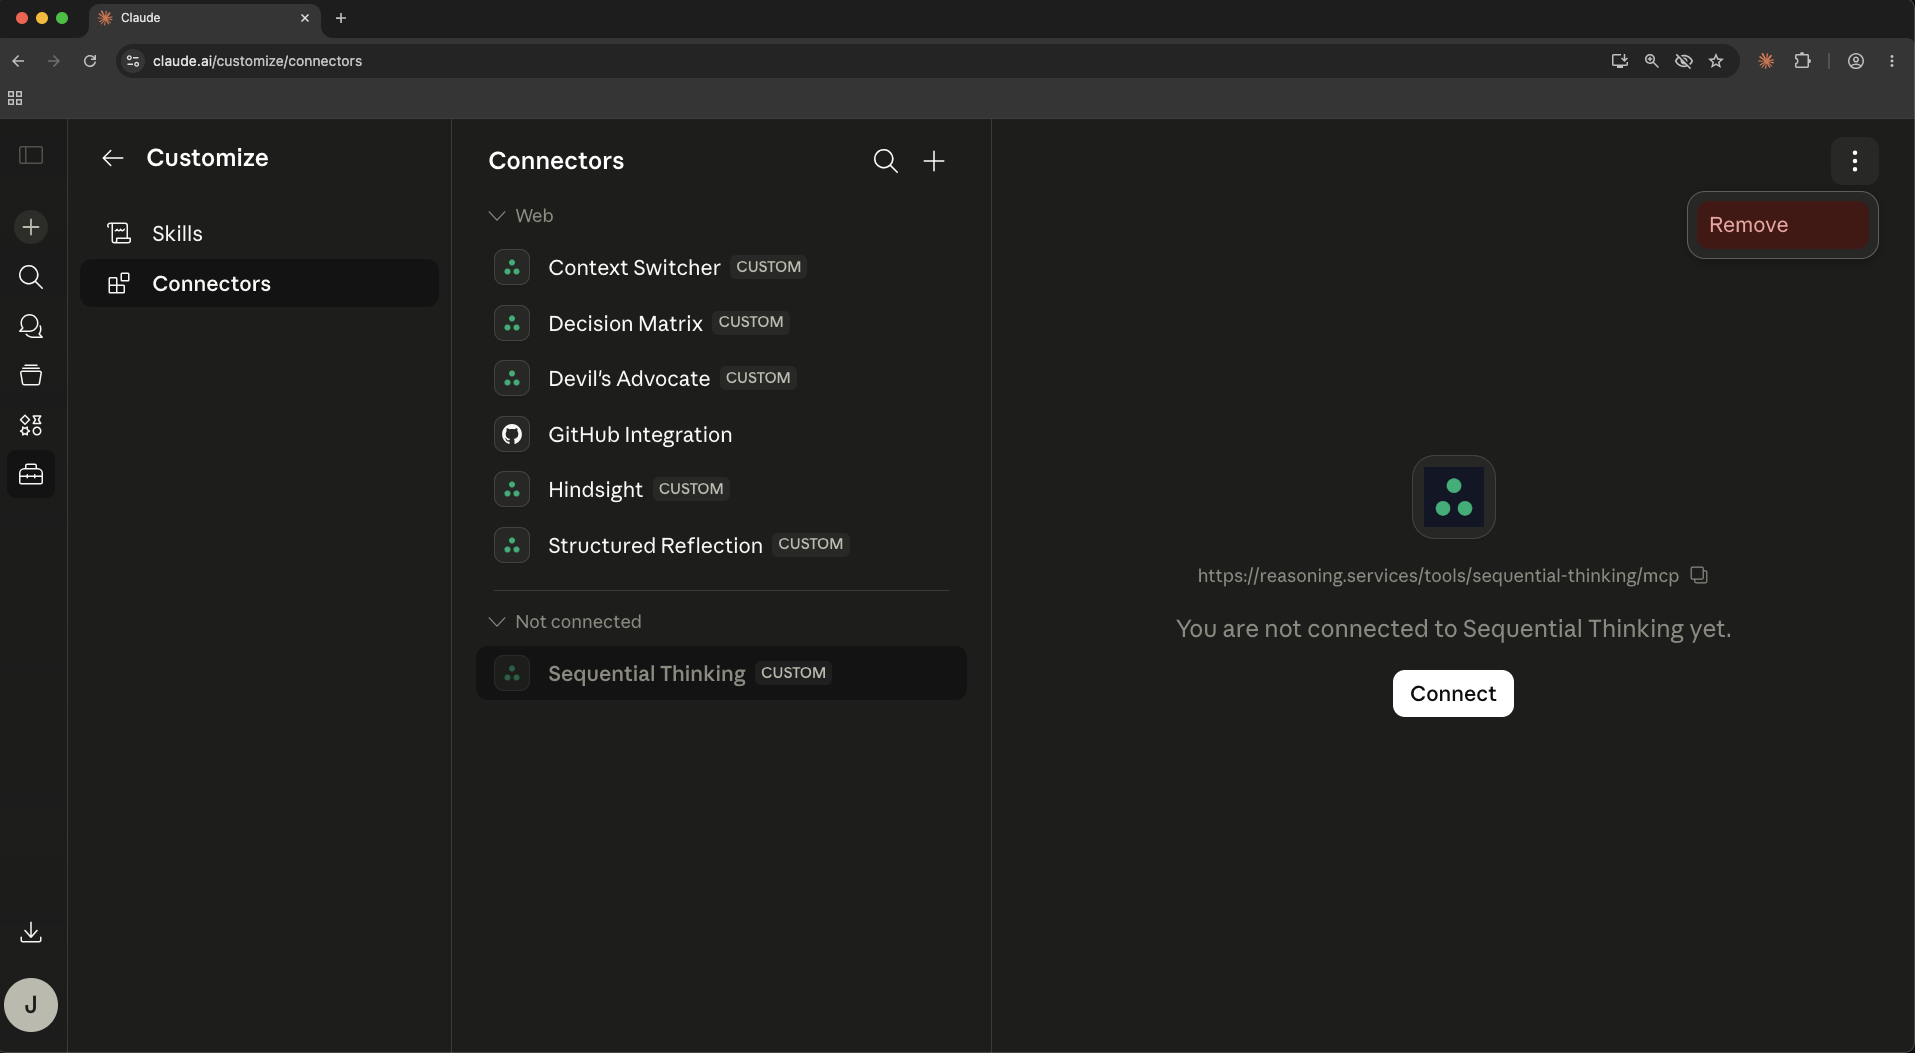
2. A confirmation dialog opens. This dialog looks the same as the Disconnect dialog. Confirm only if you intend a permanent removal.
What happens to Claude Code
Claude Code mirrors the Claude.ai connector state via your account session.
- Disconnect: Claude Code stops calling the tools immediately. Run
/mcpto confirm the server shows as disconnected. Reconnect on claude.ai and it re-activates. - Remove: The server entry disappears from
/mcpentirely. You must add the connector again from scratch.
Troubleshooting
Common issues and how to resolve them.
Connector stuck in "Not connected" after clicking Connect
The OAuth popup may have been blocked. Allow popups for claude.ai in your browser settings, then click Connect again.
Popup opens but closes immediately without success
Your browser may have third-party cookie restrictions. Try a different browser or temporarily allow cookies from reasoning.services.
Tools appear in the panel but Claude doesn't use them
Tool permissions may be set to Blocked. Open the connector detail, set all tool categories to Always allow, and try again.
"Authorization failed" or "Invalid token" error
Your session may have expired. Click Disconnect, then Connect again to re-authorize. If the error persists, remove and re-add the connector.
Connector doesn't appear in Claude Code /mcp
Claude Code must be logged in to the same Claude.ai account. Run claude /login and select your Claude.ai account. Then run /mcp to verify.
Added the connector but only see some tools
Each reasoning.services service is a separate connector. You need one connector per tool. Repeat Steps 2–8 for each URL in Step 5.
Connection succeeds but tools disappear after a day
Your OAuth token expired and was not refreshed. This is rare — if it recurs, disconnect and reconnect to re-issue a token.
Wrong account connected
Click Disconnect. When you click Connect again, the OAuth popup will let you sign in with a different account.
Ready to add the tools?
One connector per tool. Reasoning on every Claude surface.